Learning React js changed my life completely. I got many freelancing opportunities and my current remote job because I was skilled in React. I want to help others, so I’m creating this tutorial series to make some react projects for beginners to intermediate levels. It’ll be focused on the Modern React js and how you’ll write it in 2022. I’ll come back and keep updating this tutorial if anything else changes. Also, I’ll try to publish a new project/blog every upcoming week(from now), so follow nerdjfpb for that. Let’s dive into our very first blog –
What we are going to build
This blog is the first tutorial of all series so we will build a random password generator here. Let’s see how we can do it with react. We’ll add some twists here and there!
Project Features
- Generate a random password
- Password will be copied to the clipboard
- Show a popup message when it copied to the clipboard
- Hosted in GitHub pages
Pre Requisite
This blog is specific to reactjs, so you have to know a few things before following this –
- Html, Css
- Javascript (Intermediate level)
- Basic Nodejs (how nodejs, npm works, scripts)
Things I’m using
- Vscode: for writing code
- Nodejs: for different commands & npm
- Packages
- create react app: for creating packages
- react toastify: for showing the popup messages
Starting a New React JS Project
Let’s start with exploring React js a little bit. We usually go through a boilerplate called create-react-app to create a new react project. This one use webpack underhood. But nowadays VITE is getting so popular and damn fast, so if you want to start your project with VITE, that can be a great choice too! But for this tutorial, we are going to go with the create-react-app. Let’s create a react project for our project –
npx create-react-app react-password-gen // replace react-password-gen with your project name
These commands will create a folder and don’t get overwhelmed with lots of folders. Let’s go through it one by one! But before that, I guess you have got a question in your mind, right? Why do we write npx instead of npm? Normally we install anything using npm install packageName, right? So why npx? npx is a tool for executing the npm packages. Confusing right? Read more from here
Let’s drive into our current situation. We have got a lot of folders. The time I’m making this create-react-app comes with
node_modules
public
src.gitignore
package - lock.json
package.json
README.md
Ignore the node_modules because I guess you already know what’s in there. Let’s go to the public folder, and there are a few files –
favicon.ico
index.html
logo192.png
logo512.png
manifest.json
robot.txt
If you don’t know any of these files, just try a simple google search. It’s simple basic, and I’m not going to explain this! But let’s have a look into the index.html file –
<!DOCTYPE html>
<html lang="en">
  <head>
    <meta charset="utf-8" />
    <link rel="icon" href="%PUBLIC_URL%/favicon.ico" />
    <meta name="viewport" content="width=device-width, initial-scale=1" />
    <meta name="theme-color" content="#000000" />
    <meta
      name="description"
      content="Web site created using create-react-app"
    />
    <link rel="apple-touch-icon" href="%PUBLIC_URL%/logo192.png" />
    <link rel="manifest" href="%PUBLIC_URL%/manifest.json" />
    <title>React App</title>
  </head>
  <body>
    <noscript>You need to enable JavaScript to run this app.</noscript>
    <div id="root"></div>
  </body>
</html>
As you can see, this HTML file is just a basic setup, and we have got an id root here. We are loading the react app from the src folder inside this div. Let’s have a look inside the src folder now –
App.css
App.js
App.test.js
index.css
index.js
logo.svg
reportWebVitals.js
setupTests.js
we’ll make this minimal, and we’ll have –
App.css
App.jsx // js to jsx
index.css
index.js
Now, let’s start by exploring the index.js file first. We are going to clean it up for now –
import React from "react";
import ReactDOM from "react-dom";
import "./index.css";
import App from "./App";
// import reportWebVitals from "./reportWebVitals";

ReactDOM.render(
  <React.StrictMode>
    <App />
  </React.StrictMode>,
  document.getElementById("root")
);

// If you want to start measuring performance in your app, pass a function
// to log results (for example: reportWebVitals(console.log))
// or send to an analytics endpoint. Learn more: https://bit.ly/CRA-vitals
// reportWebVitals();
Here we are loading react & react-dom later. We are just passing the app component in place of the root. If you know javascript, then you already know what is happening here. We are going to write es6+ features which usually don’t support in browser. So we use webpack/some other bundling tool to convert and make some modifications to serve well in the production. We need to support all major browsers; otherwise our creation will not reach everyone.
CSS files are pretty straightforward, so I’m not going to go over those. Let’s jump to app.jsx file and delete all things from here and write some new stuff quick –
import "./App.css";

const App = () => {
  return <div>Hello World</div>;
};

export default App;
We are using a div HTML, so we are writing HTML inside a js function? Kind of yes. But it’s not HTML; it calls JSX. Almost similar to HTML; it just has some changes. Look more at here
Building the Project UI
Let’s start building our password generator app! We’ll use this app.js less complexity this time. Let’s begin the design, and I hope you already know HTML and CSS, and this part is just like HTML & CSS –
import "./App.css";

const App = () => {
  return (
    <div className="background">
      <h1 className="heading">Generate a random password</h1>
      <div className="wrapper">
        <div className="password">**********************</div>
        <button className="generate-password">Generate password</button>
      </div>
    </div>
  );
};

export default App;
CSS part –
.background {
  background-image: linear-gradient(
    43deg,
    #4158d0 0%,
    #c850c0 46%,
    #ffcc70 100%
  );

  height: 100vh;
  width: 100%;
  display: flex;
  justify-content: center;
  align-items: center;
  flex-direction: column;
  text-align: center;
}

.heading {
  color: white;
  font-size: 70px;
  padding-bottom: 30px;
  text-transform: uppercase;
}

.wrapper {
  background: rgba(255, 255, 255, 0.25);
  box-shadow: 0 8px 32px 0 rgba(31, 38, 135, 0.37);
  backdrop-filter: blur(4px);
  -webkit-backdrop-filter: blur(4px);
  border-radius: 10px;
  border: 1px solid rgba(255, 255, 255, 0.18);
  padding: 100px 200px;
}

.password {
  font-size: 60px;
  color: white;
  padding-bottom: 20px;
}

.generate-password {
  background: white;
  color: black;
  border: none;
  outline: none;
  padding: 20px 40px;
  font-size: 18px;
}
Now our style is complete, and it looks exactly the same as the screenshot –
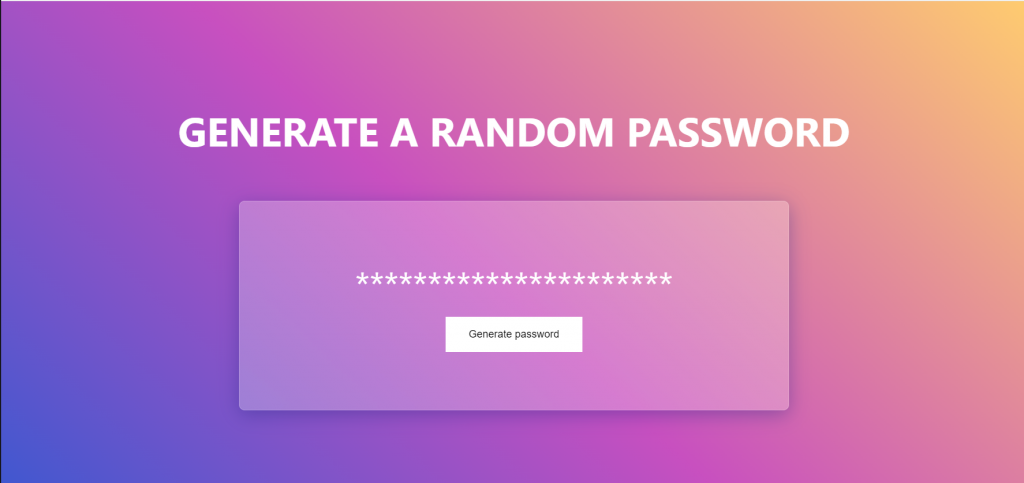
Using the State from React JS
If you look into the app.jsx file, it seems like we are writing HTML inside a javascript function, right? Yeah! That’s right! But we are not writing HTML in the javascript file. We are writing jsx. We have some power over the HTML. But before that, let’s go over a concept of how we will make this app. Steps are
- First get a const variable for holding the password “**************“
- Then when button click it’ll fire up the a function that’ll change the password value
- Re-render the part with new value (something like innerHTML maybe?)
But as, react worked based on its concept and has a virtual dom. So we will not follow how we update a dom value in vanilla javascript. React state is like a javascript variable that holds a value that can change. We will follow the hook instead of the old way of classes because the code looks cleaner and is easy to work on in the future. We need to call a useState function to get the state value for the password. So let’s call it –
import { useState } from "react";
import "./App.css";

const App = () => {
  const [password, setPassword] = useState("**********************");

  // rest of the codes
};
Confusing right? We are using useState function from react and passing so many stars. useState is actually going put the “**************” in password variable and setPassword is a function that’ll help us to update the password field. Checkout more on react website – it’s a beta now(also incomplete), old docs can make you confused so better to follow it and also learn more about state component
Now let’s write the jsx for updating it
<div className="password">{password}</div>
<button className="generate-password" onClick={generatePassword}>
  Generate password
</button>
So instead of a static value, now we got a state in password div. Now we can change it by clicking and firing the function generatePassword –
const generatePassword = () => {
  // Create a random password
  const randomPassword =
    Math.random().toString(36).slice(2) + Math.random().toString(36).slice(2);

  // Set the generated password as state
  setPassword(randomPassword);

  // Copy the password to the clipboard
  navigator.clipboard.writeText(randomPassword);
};
Relatively straightforward, right? As we are just working with string, pretty easy to set the new state. You have to call the function setPassword and pass the new value. That’s it.
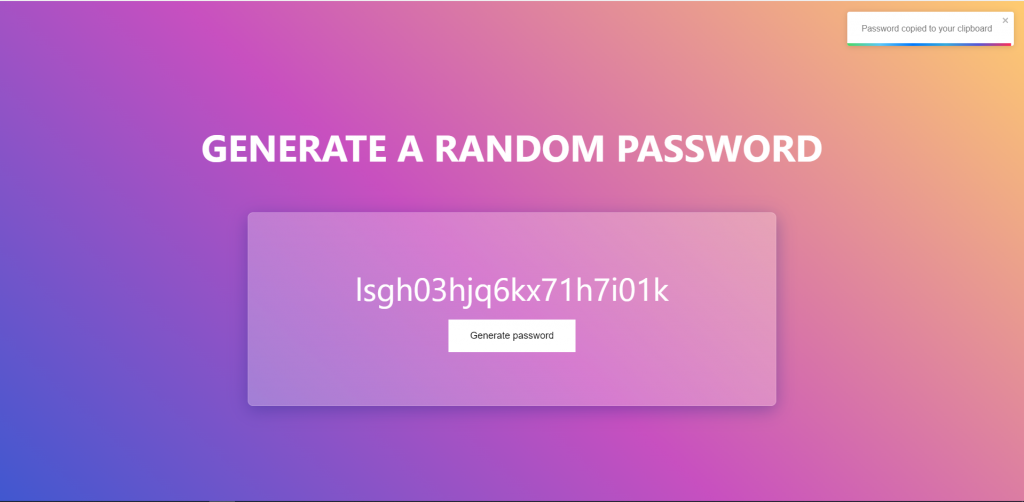
Now, this is running as we want. Click on the Generate password button, and this works like magic!
Add a popup message for user (react-toastify)
But we are missing one piece of the puzzle so far! We need to create a message for users to understand the password copied to their clipboards. Let’s use a package for this. You can use this for any production project. We are going to use react-toastify to add this. Steps for adding
- install
react-toastifyusingnpm i react-toastify - import the
react-toastifypackage - import usual style of
react-toastify - Fire function from
react-toastifywhen needed - Add the
react-toastifycontainer in div somewhere
Let’s start with the first step –
import { ToastContainer, toast } from "react-toastify";
import "react-toastify/dist/ReactToastify.css";
Importing done, let’s add the function call and container inside the component. Finally, it looks like –
import { useState } from "react";
import { ToastContainer, toast } from "react-toastify";
import "react-toastify/dist/ReactToastify.css";

import "./App.css";

const App = () => {
  const [password, setPassword] = useState("**********************");

  const generatePassword = () => {
    const randomPassword =
      Math.random().toString(36).slice(2) + Math.random().toString(36).slice(2);

    setPassword(randomPassword);

    // copy the password to the clipboard & fire toast message
    if (navigator.clipboard.writeText(randomPassword)) {
      toast("Password copied to your clipboard");
    }
  };

  return (
    <div className="background">
      <h1 className="heading">Generate a random password</h1>
      <div className="wrapper">
        <div className="password">{password}</div>
        <button className="generate-password" onClick={generatePassword}>
          Generate password
        </button>
      </div>

      {/* adding toast container so that we can showcase the message */}
      <ToastContainer />
    </div>
  );
};

export default App;
Congratulations! You’ve completed the first level of learning react. The project is done; time to check it!
Final Result
To run the project
npm start
It’ll show up in http://localhost:3000

All commands I’ve used
npx create-react-app react-password-gen // creating the new project
npm i react-toastify // installing toastify package
npm start // to run server
Source Code & Live link
You can find it from here – https://github.com/nerdjfpb/react-password-gen
See the live link here – https://nerdjfpb.github.io/react-password-gen/
What to do next? (Improvement)
- Make it using react components (going to teach that in next blog, follow for more content)
- Enable a switch for dark mode
- Add some animations
Want to take the project to the next level?
Explore how I structure react code for working with a team (this will saves a ton of time)
You can also create a live link for your react project (free)
Questions?
Drop a dm on – twitter
Want to be part of an amazing programming community and participate in free programming events?
Join our Discord server
Want to hire me for your next project?
Connect me with linkedin