Recently, I started working with a react native project with NativeBase. I feel like a custom font guide can be a little hard to understand, so I’m writing this blog to make things easier!
Pre Requisite
To follow along with the blog, you should know a few stuff –
- React Basics
- React Native basics
- Expo Basics
- Typescript basics
Things I’m using
- Vscode: for writing code
- Nodejs: for different commands & npm
- Packages
- expo ts template: for creating react native app with ts
- expo-font: for using font in expo
- @expo-google-fonts/inter: google font inter
App initialization with expo and ts
Let’s start the app using – (install expo if that’s not available in as global package)
expo init custom-font-with-ts
will open up
? Choose a template: » - Use arrow-keys. Return to submit.
    ----- Managed workflow -----
    blank               a minimal app as clean as an empty canvas
>   blank (TypeScript)  same as blank but with TypeScript configuration
    tabs (TypeScript)   several example screens and tabs using react-navigation and TypeScript
    ----- Bare workflow -----
    minimal             bare and minimal, just the essentials to get you started
Choose blank (TypeScript) because we will work with typescript! It’ll take some time. Once it’s done, let’s install our UI component library nativbase using
yarn add native-base
expo install react-native-svg react-native-safe-area-context
Install done. Now let’s go to the App.tsx file and add native-base. The file will look like this –
import { NativeBaseProvider, Box } from "native-base";

export default function App() {
  return (
    <NativeBaseProvider>
      <Box flex={1} bg="#fff" alignItems="center" justifyContent="center">
        Hello world
      </Box>
    </NativeBaseProvider>
  );
}
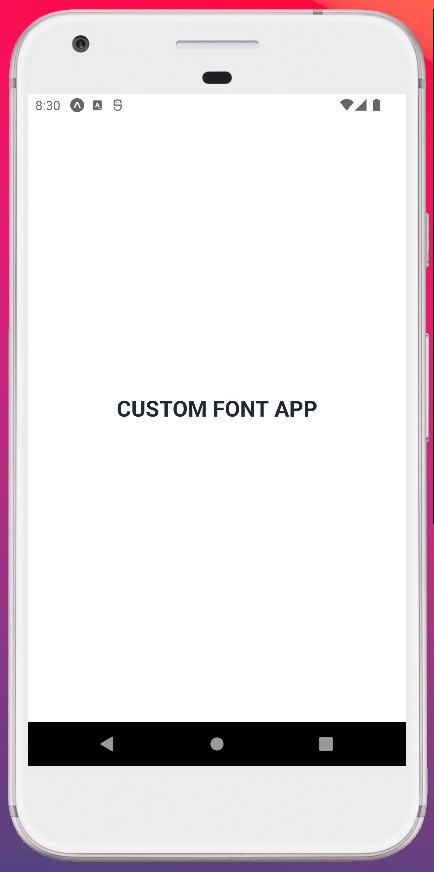
Let’s run it using yarn start. We can run it on android, ios or the web. I’ll run it in android, and it looks like –

As a default font family, its using
font-family: -apple-system, BlinkMacSystemFont, "Segoe UI", Roboto, Helvetica,
  Arial, sans-serif;
Add google font
Now let’s add some custom google font here! We are using expo, so we need to follow the expo way to installing custom google font –
expo install expo-font @expo-google-fonts/inter
I am using inter font, so I’ve installed it here. You can use other fonts as you want. Check the google fonts available by expo from here
Now we’ve to load the font in our App.tsx
import {
  useFonts,
  Inter_100Thin,
  Inter_200ExtraLight,
  Inter_300Light,
  Inter_400Regular,
  Inter_500Medium,
  Inter_600SemiBold,
  Inter_700Bold,
  Inter_800ExtraBold,
  Inter_900Black,
} from "@expo-google-fonts/inter";
import { NativeBaseProvider, Box, Text } from "native-base";

export default function App() {
  let [fontsLoaded] = useFonts({
    Inter_100Thin,
    Inter_200ExtraLight,
    Inter_300Light,
    Inter_400Regular,
    Inter_500Medium,
    Inter_600SemiBold,
    Inter_700Bold,
    Inter_800ExtraBold,
    Inter_900Black,
  });

  if (!fontsLoaded) {
    return <></>;
  }

  return (
    <NativeBaseProvider>
      <Box flex={1} bg="#fff" alignItems="center" justifyContent="center">
        <Text fontSize="2xl" fontWeight="700" textTransform="uppercase">
          Custom Font App
        </Text>
      </Box>
    </NativeBaseProvider>
  );
}
We can add the custom font, but they are not being used right now. If we look into the app, we’ll use find the old font being used. So we need to improve that by changing the theme from native-base!
Let’s do it together. Add a theme.ts file in the root and add the fonts there –
import { extendTheme } from "native-base";

export const theme = extendTheme({
  fontConfig: {
    Inter: {
      100: {
        normal: "Inter_100Thin",
      },
      200: {
        normal: "Inter_200ExtraLight",
      },
      300: {
        normal: "Inter_300Light",
      },
      400: {
        normal: "Inter_400Regular",
      },
      500: {
        normal: "Inter_500Medium",
      },
      600: {
        normal: "Inter_600SemiBold",
      },
      700: {
        normal: "Inter_700Bold",
      },
      800: {
        normal: "Inter_800ExtraBold",
      },
      900: {
        normal: "Inter_900Black",
      },
    },
  },

  // Make sure values below matches any of the keys in `fontConfig`
  fonts: {
    heading: "Inter",
    body: "Inter",
    mono: "Inter",
  },
});
Now just link the theme with our current App.tsx
import { theme } from "./theme";
...
<NativeBaseProvider theme={theme}>
...
</NativeBaseProvider>
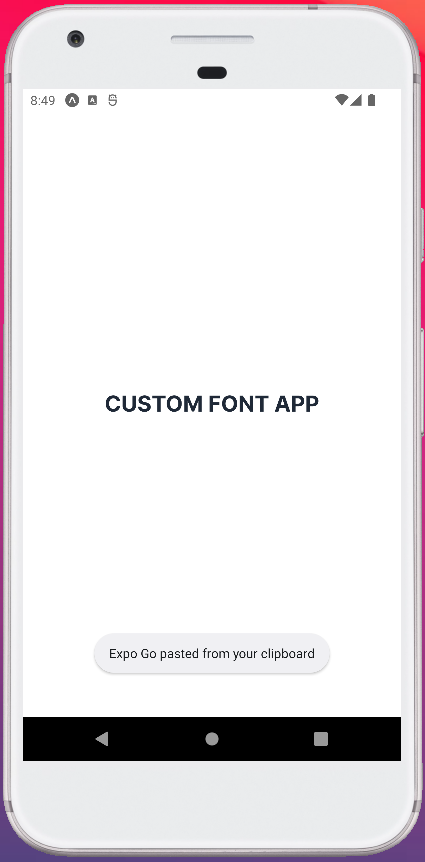
Now we can see the new font in our app. Let’s rerun it by yarn start and see the result –

This is how we can add the google font easily with expo react native and nativebase!
Want to take the project to the next level?
Explore how I structure react code for working with a team (this will saves a ton of time)
Source Code
You can find it from here – https://github.com/nerdjfpb/custom-font-with-ts
Questions?
Drop a dm on – twitter
Want to be part of an amazing programming community and participate in free programming events?
Join our Discord server
Want to hire me for your next project?
Connect me with linkedin
